
Welcome to your comprehensive homeowner’s guide on how to remove roof shingles like a pro. Whether you’re planning to re-roof your entire house or just fix a few loose shingles, you need to know how to remove the old ones without damaging your roof deck or hurting yourself.
In this article, we share some expert advice and tricks from seasoned roofers who have done this job countless times. You’ll discover what tools and safety equipment you need, such as a garden fork, a push broom, a broom magnet, and long pants.
You’ll also learn how to prepare your work area and ensure proper safety measures are in place. Plus, you’ll get step-by-step instructions on removing shingles from your roof, disposing of them properly, and replacing any damaged flashing along the way. You’ll also find out how to get a free estimate for renting a dumpster or hiring a professional roofer if you need one.
By the end of this article, you’ll be confident and ready to tackle this project like a pro. So let’s get started!
Tools And Preparation For Shingle Removal
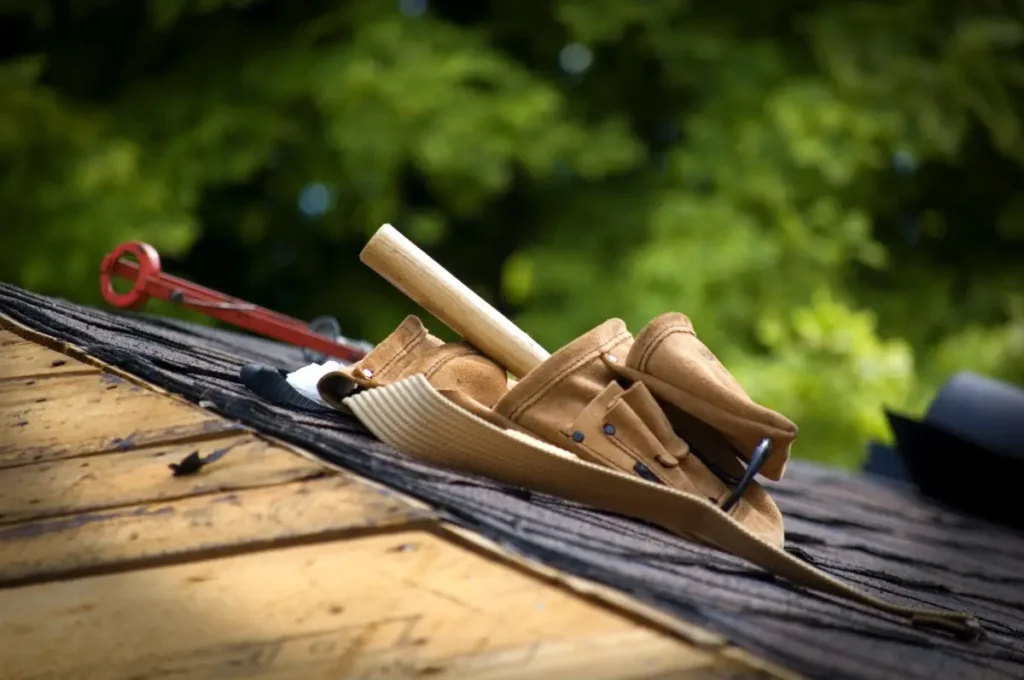
Before starting the shingle removal process, gather all necessary tools and safety equipment, such as a roofing tear-off shovel, pry bar, safety glasses, gloves, and a safety harness system.
Gather Necessary Tools And Safety Equipment
Before you start the roof removal process, you need to gear up with the right tools and safety equipment. This is a vital first step in removing all the shingles from your roof deck without damaging it or injuring yourself.
You must gather all the necessary items before climbing up on the roof, including basic tools such as a pry bar, an extension ladder, and a roofing shovel or garden fork. These tools will help you lift and pry off the existing shingles from your roof decking, especially the stubborn nails and loose shingles that might be hard to remove.
Safety is also a crucial factor when working on a roof tear project. You are not doing some desk job; you are working at heights with inherent risks. That’s why you need to invest in protective gear that will keep you safe and comfortable.
You need to wear safety glasses to shield your eyes from flying particles, shoes or boots with soft rubber soles that will grip well on steep roofs and prevent slipping hazards, long pants, and gloves to protect your skin from cuts and scrapes caused by asphalt shingles or nails.
To sum up, preparation is key here; ensuring you have both the tools of the trade and adequate protection will set a solid foundation for the efficient execution of this project. Whether you are removing shingles to install a new roof or repairing a damaged area, you need to be ready and equipped for the job.
If you are not confident or experienced enough to do it yourself, you can always hire a roofing professional who will do it for you.
Prepare The Work Area And Ensure Proper Safety Measures Are In Place
Properly preparing your work area is first and foremost in the shingle removal process. Even seasoned roofing professionals recognize that this critical step sets the tone for safe, efficient, and effective roof work throughout the project.
Safety cannot be overemphasized when dealing with tasks involving significant heights and potentially dangerous tools like pry bars. This means setting up a strong safety harness system which becomes crucial once you start tearing off old asphalt shingles from the edge of the roof.
Wear long pants for added protection against stray nails or stubborn asphalt shingle granules that can scratch or cut skin.
To maximize efficiency and minimize risks further:
- Clear your surroundings of unnecessary objects.
- Place plywood boards over garden beds to prevent damage from falling roofing debris.
- Use a chalk line to mark where you’ll place roof jacks for secure footing while on top of your home’s rooftop.
Step-by-Step Process For Removing Shingles
Start at the top of the roof and work your way down, using a roofing tear-off shovel to pry up the shingles. Dispose of the removed shingles properly and replace any damaged flashing.
Start At The Top Of The Roof
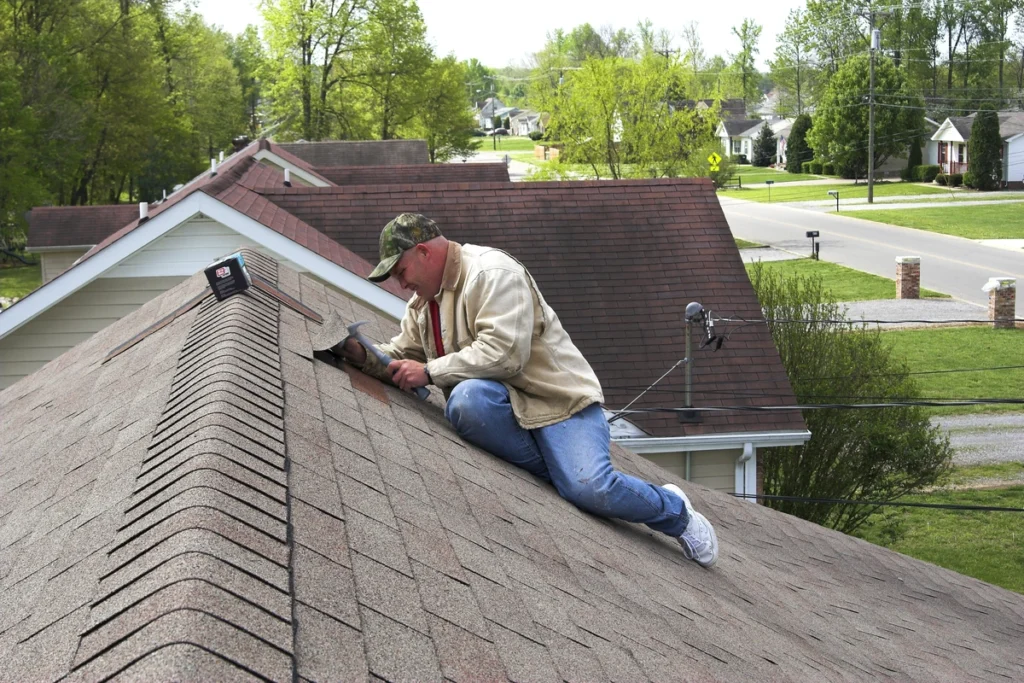
Kicking off your shingle removal process involves beginning at the peak of your roof. Often, starting from the top and working your way downward is a strategically sound approach.
For instance, suppose you have asphalt shingles on a moderately steep gable roof. You would typically begin at one of the corners at the ridge or peak of the roof. Using equipment such as a roofing tear-off shovel or pry bar (with safety glasses for eye protection), apply pressure underneath the edge of each row of nails securing each course or tier of shingles in place.
Remember, though, that immediate disposal is crucial for efficiency and maintaining a safe work environment free from potential hazards like loose nails and other debris – all too common when performing a full-scale de-shingling operation!
This will mean constant trips up and down ladders, so ensure that there’s no risk whatsoever in slipping or tripping over stray shingles while making these trips less burdensome by having their eventual destination: your trash container near enough yet still out-of-the-way preserving space below where others might walk unaware what lies above them besides yourself hard at work.
Use A Roofing Tear-off Shovel To Pry Up Shingles
To effectively remove shingles from your roof, a roofing tear-off shovel is an essential tool to have on hand.
When using a roofing tear-off shovel, start at the top of your roof and work your way down. Position yourself at the ridge caps and dig under the top layer of shingles with the shovel’s flat edge.
One important consideration during this process is disposal. As you remove the shingles, it’s crucial to have a nearby trash container ready for collecting debris.
It’s worth noting that additional tools, such as a garden fork or specially notched tear, can be beneficial when dealing with stubborn nails or hard-to-access areas.
By utilizing a roofing tear-off shovel correctly in combination with other necessary tools, you’ll be able to efficiently remove old shingles from your roof while minimizing any damage to both existing materials and structural integrity.
Removing shingles using a roofing tear-off shovel requires careful planning, proper technique, and patience.
Dispose Of Removed Shingles Properly
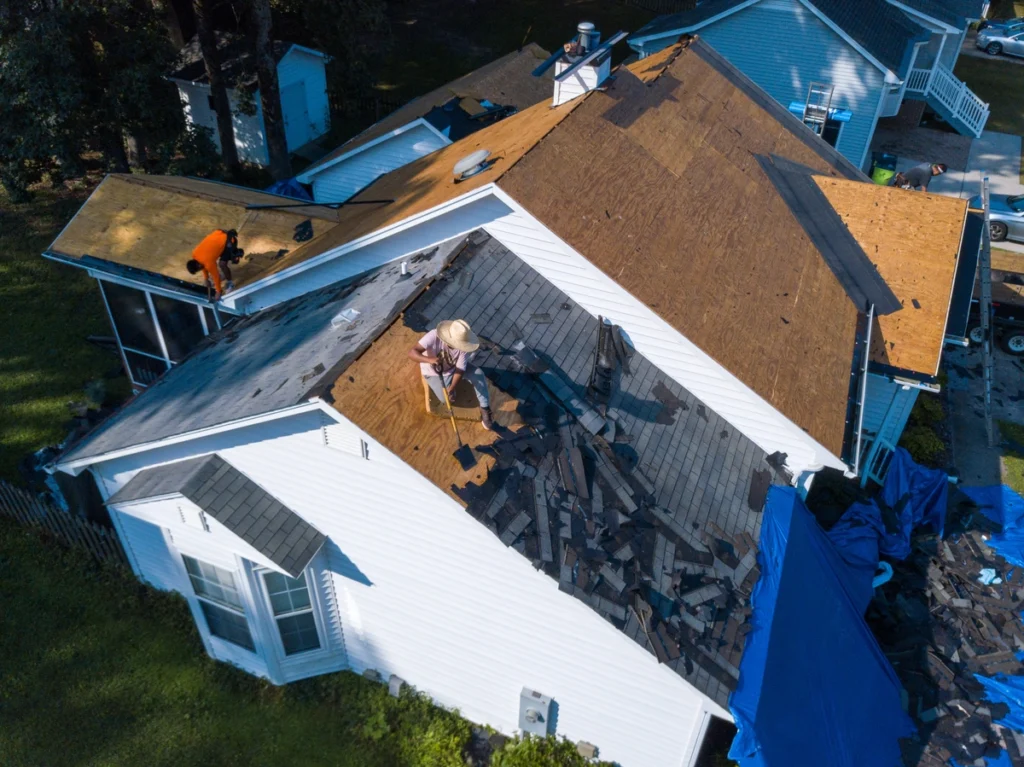
Proper disposal of removed shingles is essential to maintain a clean and safe work environment. Once you’ve successfully removed the shingles from your roof, it’s important to dispose of them responsibly.
One option is to contact your local waste management facility to inquire about their guidelines for disposing of roofing materials.
Another option is to hire a professional roofing contractor who will handle the removal and disposal process for you. These experts are experienced in handling all types of roofing materials and know the proper procedures for disposing of them safely.
Remember, some areas have state or local ordinances regarding removing and disposing of asbestos-containing materials like old roof shingles.
By following proper disposal methods, you not only ensure compliance with environmental regulations but also contribute to reducing landfill waste by recycling whenever possible.
Replace Any Damaged Flashing And Clean The Roof Surface
Inspecting the flashing is a crucial step in the process of removing shingles from your roof. Flashing plays a vital role in directing water away from your home, so it needs to be in good condition to ensure proper water drainage and prevent any potential leaks.
If you find any damaged flashing during your inspection, it’s important to replace it promptly. This will help maintain the integrity of your roof and protect against moisture-related issues.
Before starting the shingle removal process, make sure to clean the roof surface thoroughly. Removing debris such as leaves, branches, and dirt will allow for a smoother workflow and help you spot any hidden problems more easily.
With both these tasks completed – replacing damaged flashing and cleaning the roof surface – you’ll be well on your way to successfully removing old shingles and preparing for a fresh new look for your home’s roof!
Conclusion
To conclude, removing shingles from your roof is not as hard as it may seem if you have the right tools and preparation.
Before you begin:
- Ensure you have all the necessary tools and safety equipment.
- Prepare the work area by setting up safety measures and clearing any obstacles.
- Start at the top of the roof and use a roofing tear-off shovel to pry up the shingles gently.
Removing and replacing shingles on your roof is important to keep it in good shape and prevent leaks or damage.
By following these steps, you can remove shingles from your roof with confidence and without causing more problems or compromising its structure. Be careful during each step of the process, and always put safety first.
If you need any help or advice with your roof removal project, don’t hesitate to contact Rankin County Custom. We are a professional roofing company that offers quality services at affordable prices. We can help you with any roofing needs, from shingle removal to installation of a new roof.
We look forward to hearing from you!